Recipe by Request: Turkey Burgers

Flavorful Turkey Burger

Flavorful Turkey Burger

My friend Beth and I were sitting on her front porch one evening talking about World Peace and other such important matters when the conversation naturally came around to food.

Like me, she is trying to work a variety of foods into her family’s diet, rather than eat the same old things. It is SO easy to get into a cooking rut. Trust me: I know.

At her request, I’m sharing this delicious recipe here so all of you have an opportunity to try it. 🙂

This is from my Food Lover’s Make It Paleo cookbook. If you have no idea what the Paleo diet is, just know that Paleo recipes are almost always very flavorful, and made from natural, whole-food products. They are usually also without sugar or grains.

If you like lots of flavor, you’ll like this recipe…and the simplicity of it! You can also use ground beef with this recipe. In the cookbook, it was served as an open-faced sandwich on a Portobello mushroom in the place of bread.

TURKEY BURGERS

1 lb. ground turkey or ground beef

Seasoning:

1 tsp. garlic powder

1 tsp. onion powder

1 tsp. salt (I always use kosher salt in my recipes)

1 tsp. pepper

Mix together seasonings, and pour over ground turkey.

NOTE: If you’ve ever worked with ground turkey, you know it can be somewhat sticky. Just before I dive my hands into the meat to mix, I wash them and spray them with oil. This will make it much easier to make patties without half the meat sticking to your hands.

Form the meat into four equal-sized patties.

I also spray my grill grates before grilling any kind of meat; I even spray my spatula when working with turkey. Pam makes a spray oil just for grilling; your oil just needs to be able to endure high heat.

The recipe says: Grill turkey patties on high for about 5 minutes per side, flipping once.

If you know your grill, you know how much heat works best and where your “hot spot” is. I heat up the grill to about 300, and turn the heat to low, grilling them until the outside edges start to look a little white and there are grate marks clearly visible (which is about 5 minutes). Then, I turn them, watching them closely until there are visible grate marks and they look “done”.

If you cook them too long, they are still flavorful, just dry. It works best if you check them frequently and pull them just at the point they are done.

I can’t roller skate and chew gum at the same time, I don’t know why I ever thought I could multi-task while I was cooking. 😀 Enjoy!

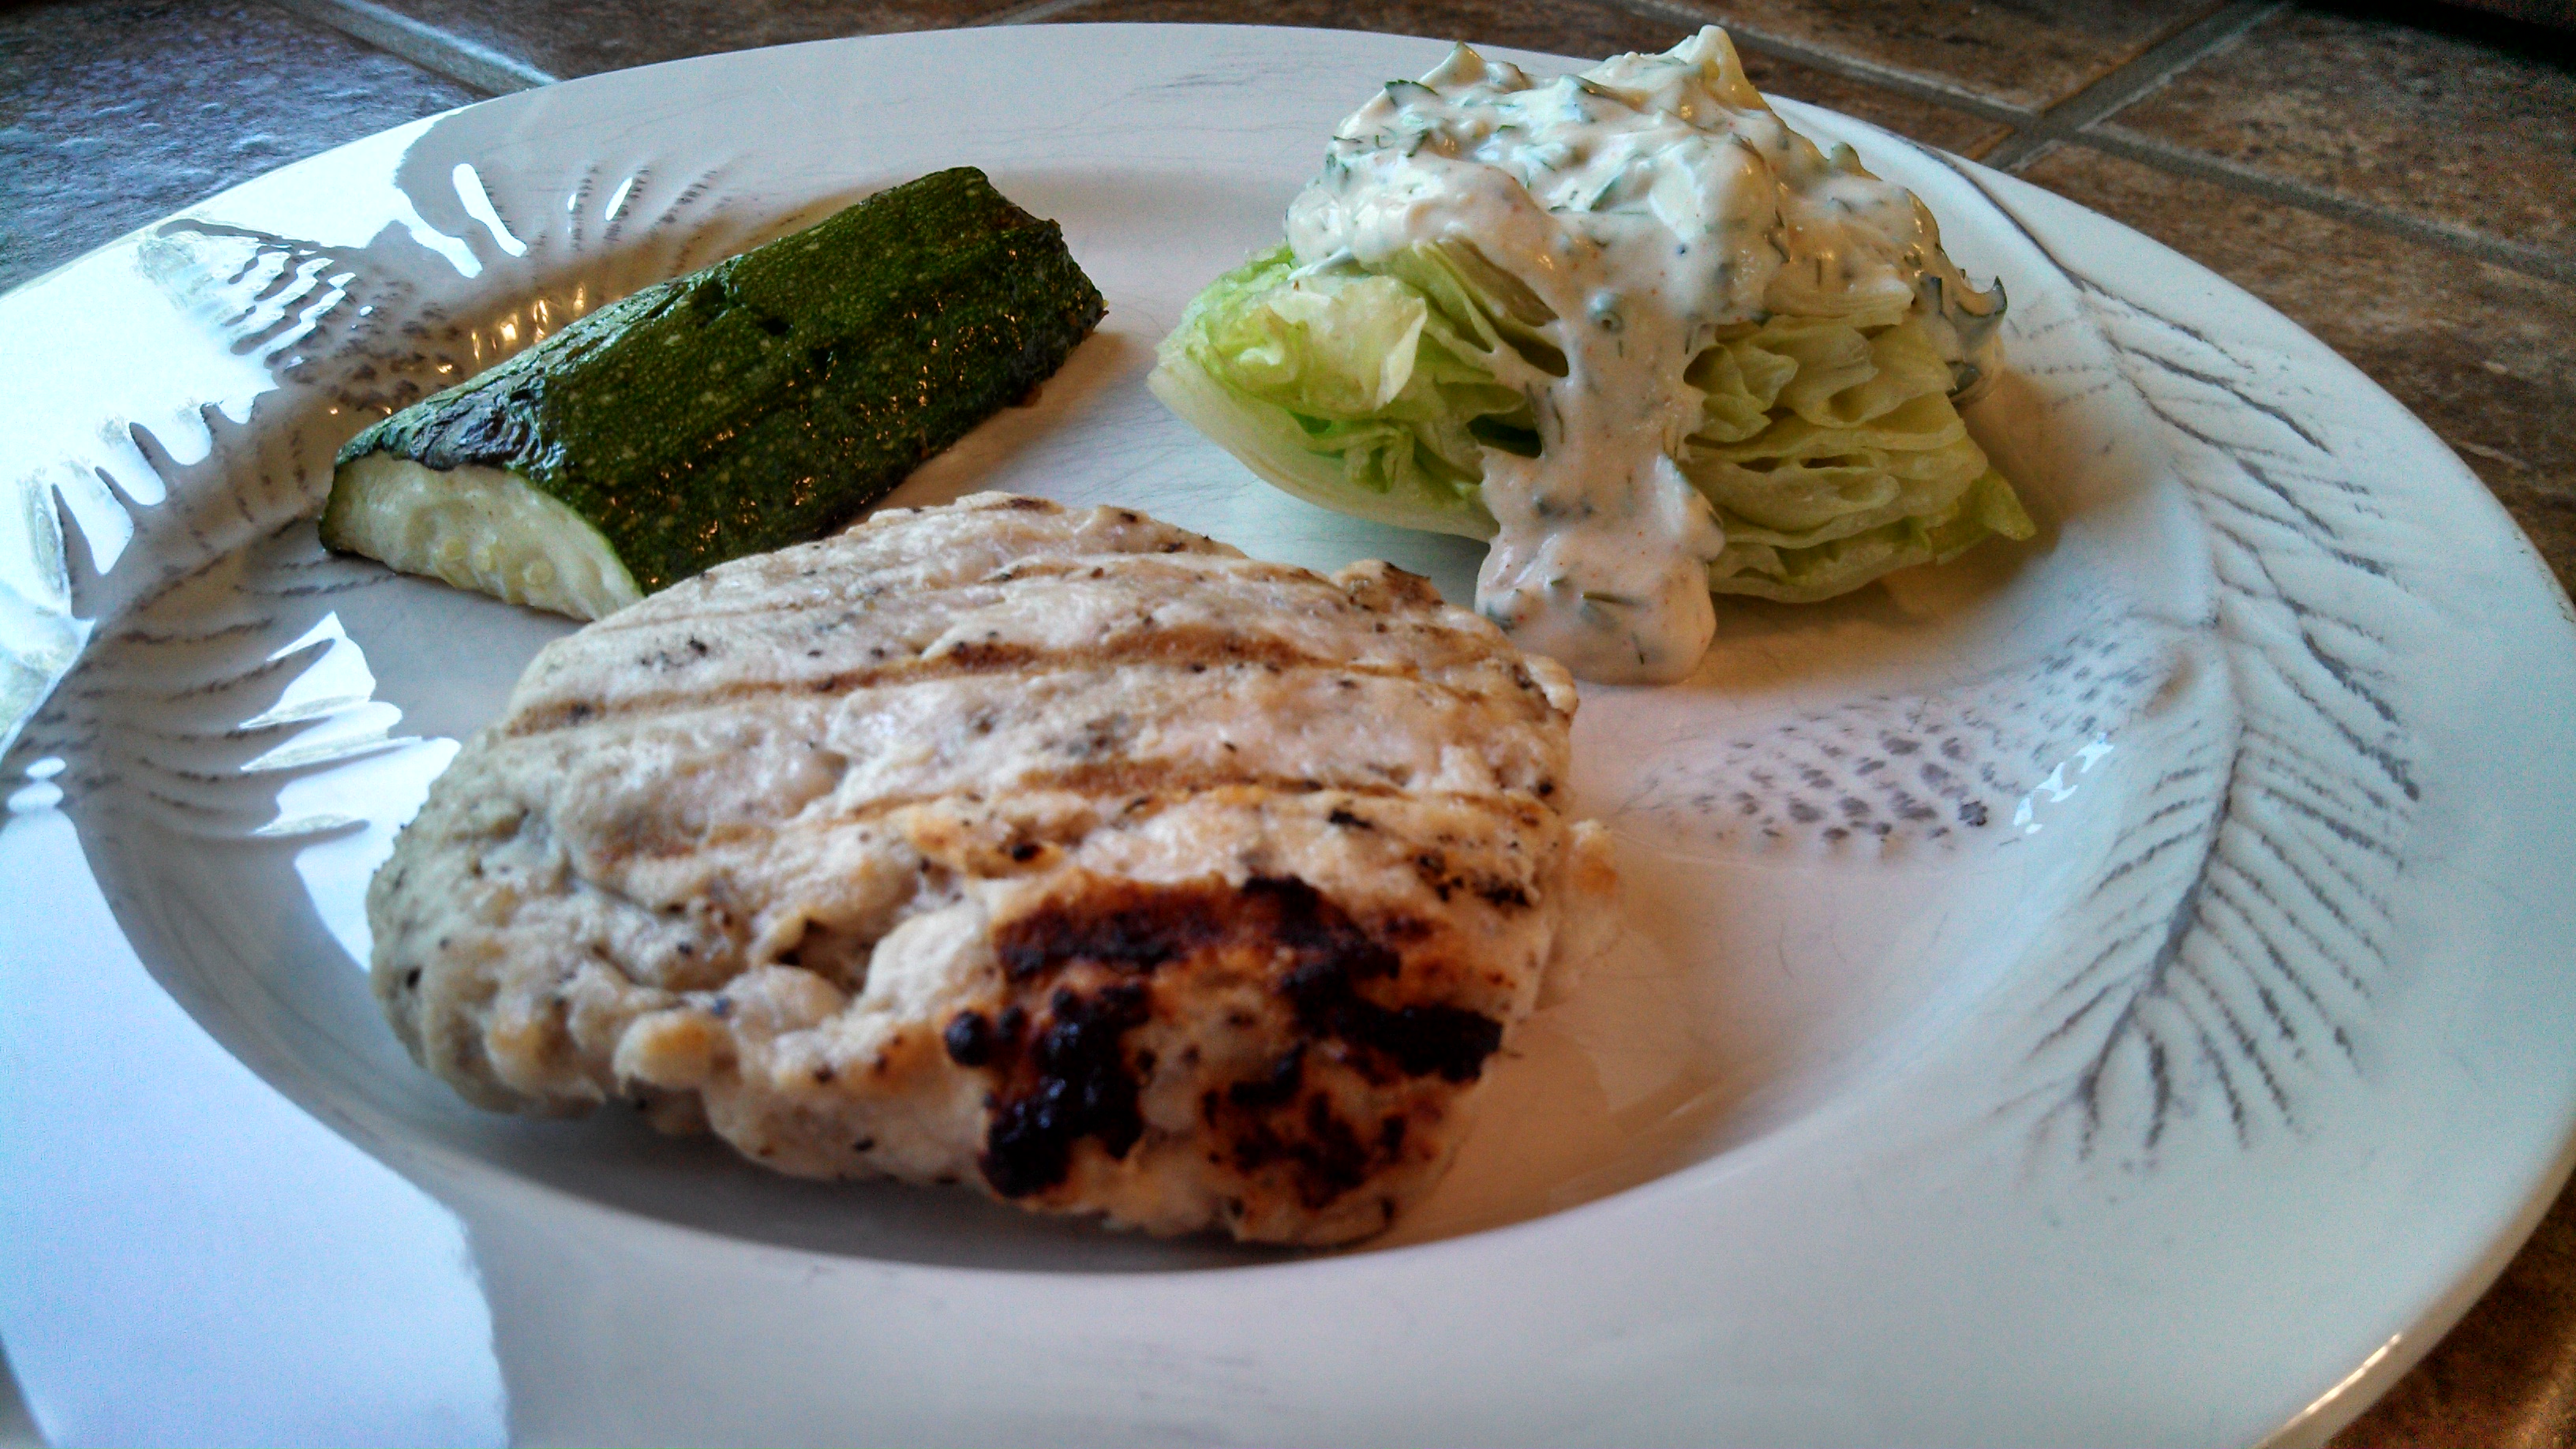
Mine are served here with grilled zucchini and a lettuce wedge with homemade ranch dressing. YUM!


Groundhog Tales: Chapter 2

Mr. Groundhog and the Shed

Mr. Groundhog and the Shed

So, this isn’t the best picture in the world. I had to dig through some film camera archives and pull it out. But trust me…you’ll understand why when you keep reading.

In the last installment of “As the Groundhog Turns” (he he) we had just left Jimmy being green in our smoke-filled house. If you missed that story, you can read it here:

https://carmenstanton.com/groundhog-tales-chapter-1/

We hadn’t seen Mr. Groundhog for a while. This is one of the first pictures I took of him.

At least, we’re totally assuming it’s a him. It’s not like we have supporting evidence to back up that assumption. You can see him through the deck spindles, with our old shed in the background.

I’ve circled him, just to make it easy.

I was home one afternoon when Jimmy burst through the back door, shouting:

“Where’s my gun?!  I went in the shed to look for something, and that @#$%&* groundhog nearly jumped on my head. I’m gonna shoot that [expletive deleted]!!!”

I’m not sure if he was more mad or excited. It was sort of hard to tell.

He grabbed the gun, which at the time, was conveniently located next to the back door. It must have been close to deer season.

He disappears into the shed.

The next thing I hear: BLAM! (pause) BLAM! (longer pause). Then: BLAM!BLAM!BLAM!BLAM!BLAM!BLAM!BLAM!

Several minutes later, the back door opens.

“Well, did you get him?”I asked.

“I’m not going to tell you. With you being an animal lover, you might be upset. So I’m not going to tell you.”

I’m reasonably certain that meant No.

That was the last we saw of Mr. Groundhog for a while. At least until Spring. BWAH HA HA HA HA HA 😉

The Finished Flowerbed

Finished Flowerbed Can I just say that right now I am in Project Heaven?

I work best and am happiest when I can work like a butterfly. And sting like a bee. (Sorry, I couldn’t help myself. Or was it ‘move like a butterfly, and sting like a bee?’) My apologies if you aren’t old enough to remember Mohammed Ali. But I digress.

I am happiest when I am juggling multiple projects and can flit from one to the other, whether it be work or play or work at home.

Anyway, the flowerbed is done. *Happy Dance!*

I did not enjoy it.

But doesn’t it look nice?

I have one blue fescue plant that is struggling; it’s a sun-loving plant that was living in the shade at the store. And of COURSE there was no other blue fescue in town, so I’m hoping it will come out of it.

I typically go with a color palette of pinks, purples, and white, and a variety of textures in my landscaping. Easy on the ornaments.  I’m liking the look. Just in case you forgot what it looked like before, here is the ‘before’ shot.

Front Flowerbed The perfectionist in me crept in once. I realized I there were a couple of plants that I should have moved a couple of inches a different way.

Two inches.

Dig up a plant on a hot day and move it two inches? N.O.

I got over it.

Then I really got over my perfectionism when I sent two men to the store to pick up pea pebbles for me. Graciously, they complied. And brought home two different colors of pea pebbles. (!) Fortunately, it takes a lot of pea pebbles.

After I was done, I realized it didn’t match the pea pebbles in the other bed.

Who knew there were so many colors of pea pebbles?

I didn’t need it to be perfect, I just needed it to be done. Chances are, you would have never noticed it didn’t match the other bed.

Now I’ve made you want to look. 😉

Time to celebrate! 😀

The Day I Met My Husband

The Night We Met

The Night We Met

15 years ago today, July 3, 1998 I met a guy in a bar in Kirksville. Little did I know then that I would end up spending the rest of my life with him.

Actually, it was two days later that I realized that.

This is a picture of us the night we met. (Who is lucky enough to have a picture the night you meet your spouse?) Sorry about the quality…keep in mind it was before digital cameras.

At the time, I was a showgirl in Las Vegas (kidding!) Little did I know when I made the spur-of-the-moment decision to come back home for a vacation just how momentous that decision was.

After I got back here, I called my friend Denise, and we decided to go out and hit the town. If memory serves me correctly, we never got beyond our second stop.

It rained 3 inches that night.

I belched in front of him.

He peeked down my shirt.

We got my car stuck.

The tow truck driver who came to pull me out in the pouring rain said, “I don’t know where you found that guy, but if he won’t even get out and help you, I’d get rid of him!”

So I married him instead. 😀

How to Stay Married While Working on a Home Project

Before Restore

A Note About the Stone Wall

So, I finished my flower bed project today. But before I show you that, I wanted to tell you about the time Jimmy and I spent a Saturday dry-stacking the stone wall several years ago.

We still managed to stay married.

We were still speaking at the end of the day.

And by the evening, we were best friends all over again.

We have not always been this successful.

It all comes down to Strategy.

Ya gotta have one BEFORE you start. You know it’s gonna happen…so plan for it in advance.

So here’s what we did:

We decided that when one of us (ahem) said something that the other found offensive/insulting/hurtful/etc., the offendee would say “Dorito”. (We tried to pick the silliest word possible that had nothing to do with what we were doing, and didn’t make the other (ahem) feel as though they were in the wrong.)

Then, we had to smooch.

How can you be irritated at someone, think about Doritos (yum, especially with sour cream, but please don’t tell anybody) and then have to smooch on them?

It worked marvelously.

If nothing else, it makes both parties more aware of your choice of words. In the end, I think we only smooched once or twice.

At least, just after saying “Dorito.” 😉

Mission accomplished!


The Flowerbed Makeover, Step 2: Painting the Foundation

Before Restore

Before Restore


It’s supposed to be really nice this weekend. Like, gorgeous. Weather like this is a DIY’ers dream.

So in honor of that, I thought I’d share this terrific project idea to really give your house some Curb Appeal. Not only will YOU like the look, so will buyers if you happen to sell your house at some point in the future.

This is the flower bed after I tore out all the flowers, weeds and mulch. See how ugly that exposed foundation is?

You can see it actually has a dark color of stain on it: it had fallen victim to a failed project to stamp the wall to make it look like stone. A great concept, it just didn’t work well in reality. (Meaning, it required both of us.)

When we had the deck enlarged last summer, we had our contractor paint our exposed foundation with Restore. We just hadn’t done this part. (Honestly, I don’t think we thought about it. You really didn’t SEE it, and you know how it is when you don’t see something…)

On a recent weekend, I used our leftover Restore to paint this portion of the foundation in the picture shown below that had now been exposed.

I did not enjoy it. But I love, love, love the finished product!

"Restore'd" Foundation

“Restore’d” Foundation


Restore makes it look a little bit like it’s been stucco’ed. It gives it a solid texture, and helps fill in cracks or small holes.  Restore is made by Rust-Oleum, comes in several colors, and is available for decks or concrete.

If you’re painting concrete,  make sure you purchase Restore for Concrete. The Deck Restore is not thick enough to stay on a vertical wall.

Behr also makes a similar product for both decks and concrete, called Deckover. It comes in 54 colors, according to their website.  Either of these should be readily available in your local home improvement store.

We have a walkout basement on our addition, so a great deal of our foundation is exposed. It required one Home Depot and two Westlake’s to get us all we needed.

It goes on very thick, so you’ll use more than you would if you were simply painting or staining the same surface. It uses special rollers to give it the texture.

It is messy.

So make sure you wear shoes and clothes that you really don’t care about. And use plastic to cover up your patio or your nice landscaping.

Here’s a tip: Because Restore requires 3-6 hours to dry, if you decide to paint one coat one day, and the second coat the next, wrap your rollers in plastic and stow them in the freezer overnight. I highly recommend tossing them when your project is complete. These aren’t rollers you’ll be using again. And, be sure to use some blue tape to protect your siding.

Ladies, I recommend wearing plastic or latex gloves to protect your manicure. Ask me how I know this. 😉

Happy Restore-ing! 🙂

The Sangria Recipe

Delicious Sangria!

Delicious Sangria!

Here’s the Sangria recipe, as promised. This was fun to make, yummy to drink, and made a beautiful presentation!

I would really love to tell you that I created this recipe; it’s more like, I kitchen-tested this recipe for you. 🙂

I’m a huge fan of Ree Drummond, The Pioneer Woman (www.thepioneerwoman.com.) All her recipes are simple and delicious. Every time I make one, it’s like I hit the ball right out of the park. So this is one of Ree’s recipes. Thanks Ree, for making my life so much easier.

2 Granny Smith apples, cored and cut into cubes

1 cup green seedless grapes

1 cup red seedless grapes

2 cups pineapple chunks (I used canned for this, fresh was too much trouble and too expensive!)

1 small unpeeled orange, thinly sliced

2 unpeeled lemons, thinly sliced

2 unpeeled limes, thinly sliced

1.5 liter red wine (such as Cabernet, Merlot or Pinot Noir)

1.5 liter dry white wine (such as Chardonnay, Sauvignon Blanc, or Pinot Grigio)

1 cup orange-flavored rum

1 cup orange-flavored vodka

1 cup sugar

When it came to purchasing the wine and spirits for this, I followed same rule as using wine for cooking: “If you buy a cheap, crappy wine to cook with, it’s going to taste like cheap, crappy wine in your food.” So I looked for something that was good quality but yet reasonably priced.  For the wine, I bought Robert Mondavi’s Woodbridge Pinot Noir and Sauvignon Blanc. I bought Absolut vodka, and Parrot Bay rum.

Place all the fruit in a large container. Start pouring the liquids: the wines, followed by the vodka and rum. Finally, to add a subtle sweetness, dissolve the sugar in 1 cup of water and add it to the mix.

Stir well, cover and refrigerate for several hours, giving the fruit and liquids time to “steep”. Serve in glasses over ice. The fruit is also delicious to eat!  Your guests will think you ROCK. And so will you, if you have too much.  😀

Groundhog Tales: Chapter 1

The Newest Groundhog

The Newest Groundhog

Yes, that is really a groundhog in our mulberry tree. Apparently, groundhogs are really related to squirrels. Who knew?

The Stantons have a rich and storied history with groundhogs.

In September, 1998, I moved back here from Las Vegas, Nevada to be with Jimmy and start our lives together. After 11 years of desert living, where winter lasts about 2-4 weeks and then it gets warm-warmer-HOT, I was completely in love with experiencing Autumn again.

We especially enjoyed watching the roly-poly groundhog, as he lumbered around our yard stuffing himself with acorns in preparation for a long winter’s nap. We were temporarily dog-less, as my girls were still in Las Vegas with my parents for a few months until I got all settled in back here.

So Mr. Groundhog had free rein; he came and went, and we enjoyed watching him come and go, his increasingly rotund body going about his business. He was so cute!

And then he moved in under our front porch.

Our front porch sank several inches on one side as his tunnels got larger. And our basement began to leak when it rained.

Concerned, I called my friend’s dad, who worked for the conservation department at the time, and asked him what to do.

Always a man with a sense of humor, Hollis replied, “Oh, just wait a few weeks, he’ll go to sleep and you’ll never know he’s there.” There’s a comedian in every crowd, isn’t there? LOL

One Saturday I came home after being gone most of the morning. A house full of smoke greeted me when I opened the door.

“What happened?” I was horrified as I looked at Jimmy sitting on the couch.

He was green.

“I was trying to flush out the groundhog, so I put two mole smokers into his tunnels under the porch. I feel sick,” he said weakly.

Fortunately, as soon as I opened windows and the air cleared, Jimmy’s complexion returned to its normal color.

And apparently, it was enough for Mr. Groundhog too, because he moved out from underneath the front porch. We assumed he’d gone back into the forest and found somewhere else to live.

But you know what happens when you assume things….

PROJECT: A Flower Bed Makeover

Front Flowerbed

BEFORE

Over the years, my landscaping has taught me one thing over and over:

“Low maintenance” does not mean “No Maintenance.”

Take this flower bed for instance.

The grasses were overgrown.

Some of the plants were dead.

Some of the plants I wondered what on earth possessed me to pick THEM? What was I thinking?

Why did I let myself be talked into cedar mulch?

Why did I let it go so long?

Is it too early for a drink? (Just kidding, not really. That came later.)

It had reached the Point of No Return: the best plan, I decided, was to rip it out and start over. The “over” comes later. You’ll have to stay tuned.

I did not enjoy it.

The cool thing about being married to a contractor is the toys that come as part of the package deal. I had most of it ripped out, and Jimmy brought the backhoe and helped me with the rest.

5 years worth of plants, mulch, and landscape fabric discarded: $235

Backhoe fuel, additional black dirt, and ruined pair of shoes: $122.50

Co-Pay for back adjustment after ripping out flowerbed: $35

Having all this ugly crap gone: PRICELESS! 🙂

A Great Party Idea!

CheezItI learned this valuable tip during my college years. (This was early on in the 12-year plan.) Clearly my dad was an optimist. He kept allowing me to go.

Oh, the memories of being a sorority pledge.

I hope I don’t go to Sorority Prison for telling this long-kept “secret.” Man. That would be terrible.

As lowly pledges, we all did this to earn the highly-coveted status as “Active”.

If there was more than one pledge at a time in the Chapter Room serving them, the room was a harmony of “Cheez-It?’s”.

This would be a great conversation starter at your next party. Or hey! What a great activity for your kids!

It’s very simple to prepare:

Buy a box of Cheez-Its.

Straighten the hook end of a wire hanger. Thread the Cheez-Its on the hanger.

Place the hanger on your head, with the Cheez-Its in front.

You (or your kids) then approach your guests, one by one. Tilt your head, so the Cheez-Its are within reach, and ask them if they’d like a Cheez-It.

In those days, the Actives had to eat the Cheez-Its directly from the hanger. That could be a little tacky at a cocktail party.

The bounds of sisterhood go far and wide. Even to Gulf Shores. And balcony stories.

Here’s to memorable parties, laughter, and sisterhood.

CheezIt? 😀