How to Make Homemade Noodles

DSC05531Nothing says “I Love You” more than homemade noodles.

If you grew up in the Midwest, you know I’m talking about the homemade noodles like your mom or grandma used to make. And, to be very clear, homemade noodles are NOT pasta.

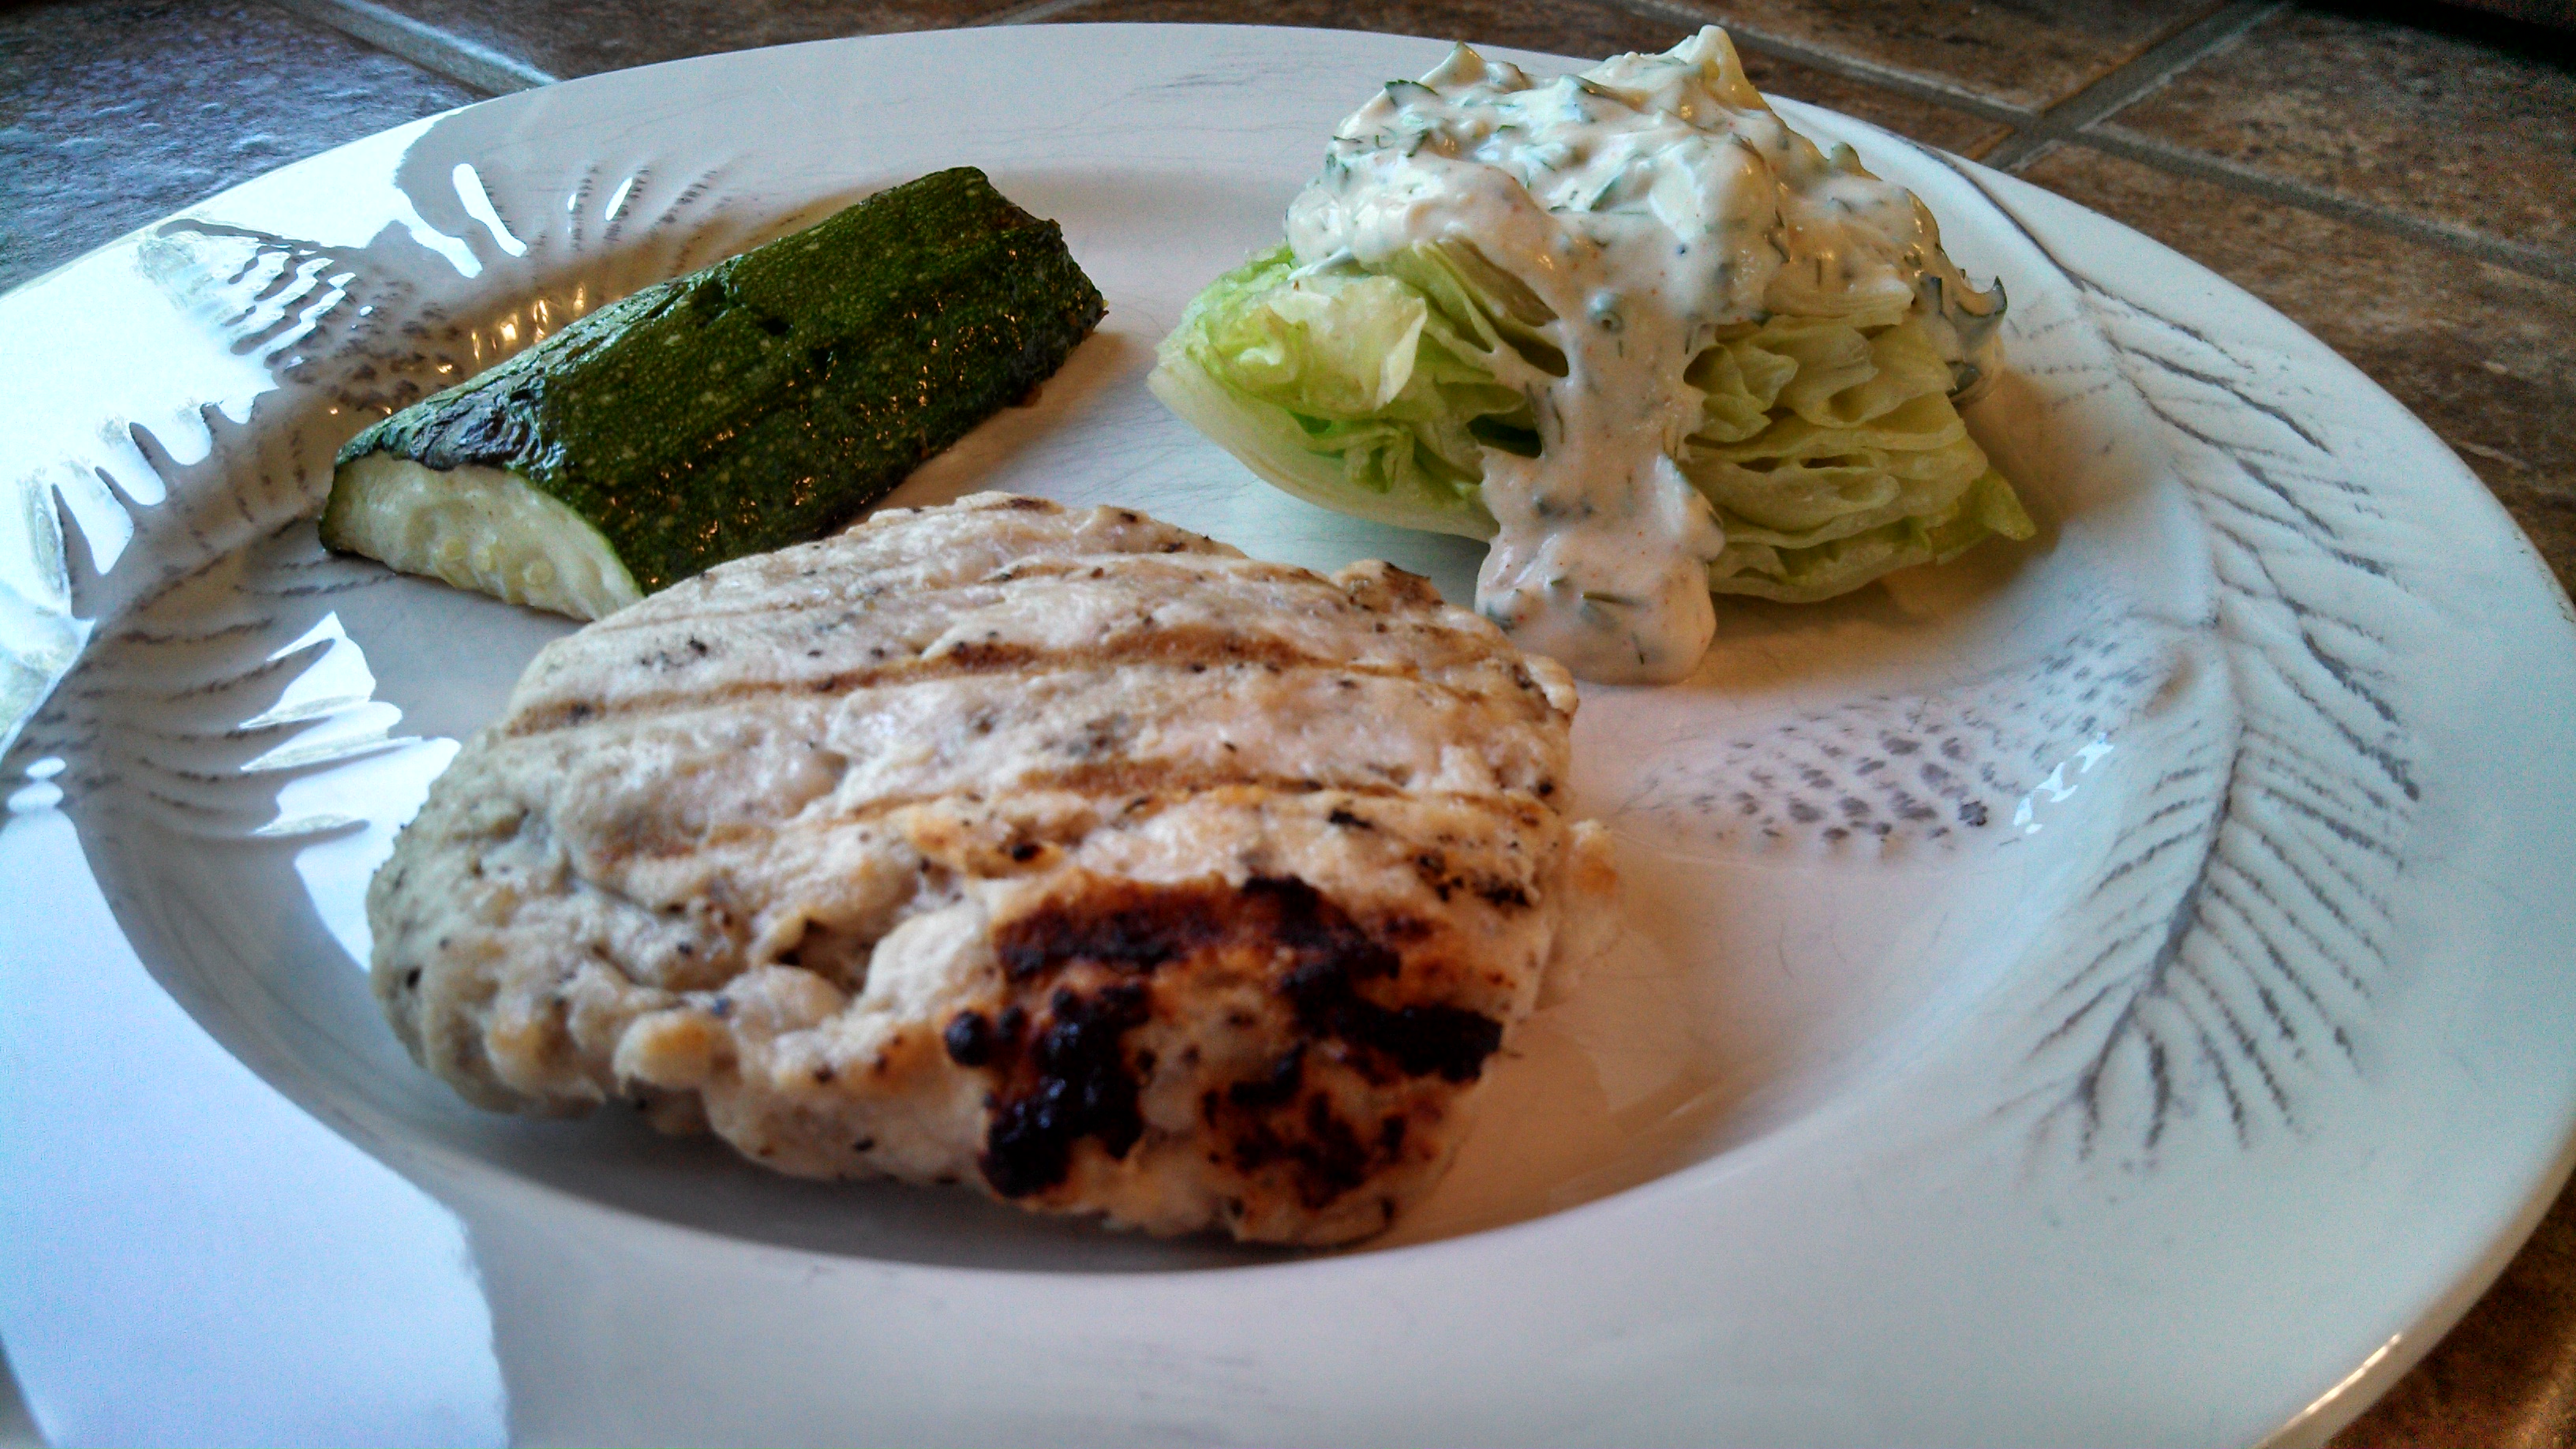
No, homemade noodles are wonderful comfort food goodness, best eaten with a roasted chicken or turkey. Some like to pour them over mashed potatoes, and some prefer to eat them as a stand-alone part of the meal. I may, or may not have been known to eat them for breakfast.

I prefer to make them thinner, like my mom made. Or, you can make them a little larger and call them dumplings. Like chili, the making and consumption of noodles is a personal, individual choice.

DSC05528

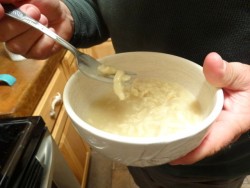
And with that last sentence, I decided I had to make some RIGHT NOW. 😀 Sorry about the less than stellar picture quality. Turns out my kitchen lighting isn’t so good for cooking on cloudy days. :-/

Learning how to make homemade noodles is a talent passed down from older generations. You still have time to practice and impress your family!

You almost can’t screw them up!

The keys to this recipe:

2014-10-10 10.36.41

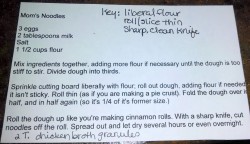
You need a really, really sharp clean knife.

Use flour liberally. And then use more. Like, you can’t really use too much.

Cut the noodles as thin as you possibly can.

Here’s the recipe, along with some play-by-play info. 🙂 Even the eggs are happy to be made into noodles. 😉

2014-10-10 10.37.31

Mom Gunnels’ Noodles

3 eggs

2 Tablespoons milk. Whole milk or 2% is best, although when I made this last batch, I had to borrow 1% from my neighbor. Other than a slightly different texture with the dough, we couldn’t tell any difference in flavor.

Salt (I use kosher, probably about 1/2 teaspoon)

1 1/2 Cups Flour

2 Tablespoons chicken bouillon granules

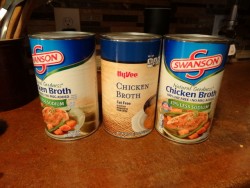
2-3 LARGE cans chicken broth I usually buy reduced sodium broth, since the broth granules have  quite a bit of sodium in them. You can always salt them more, but not less!

DSC05518

Mix together all ingredients with a fork, adding more flour if necessary until you have a stiff dough that’s too stiff to stir.

2014-10-10 10.42.55

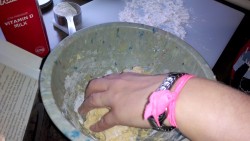
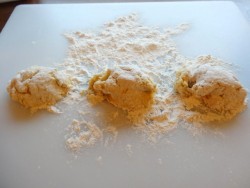
Divide the dough into thirds, adding flour if needed to make it less sticky and easier to handle.

DSC05509

Some of these pictures are from last year, when I taught my friend Peggy how to make noodles. Her husband is from Pittsburgh, so we enjoyed introducing him to the glory of homemade noodles gently spooned over a mound of mashed potatoes.

Using 1/3 of the dough at a time, place it on a large, liberally-floured cutting board.

Adding more flour as you go (see what I mean?), roll it it out very thin, as if you were making a pie crust.

2014-10-10 10.49.45

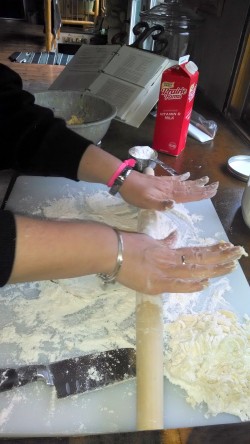
(I think I’ve made pie crust like, 3 times in my life. But I’ve seen it done. ) The best comparison I can think of would be a large flour tortilla.

DSC05510

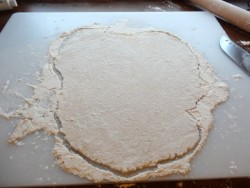
It’s very likely you’ll need to keep adding flour, as it may get sticky as you roll it out.

Once the dough is rolled out flat and nice and thin, pick up one side and fold it over in half. Add more flour if necessary.

DSC05511

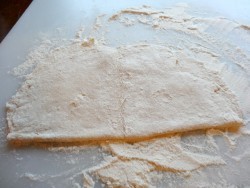
Then fold it in half again, so it’s 1/4 of its original size.

DSC05512

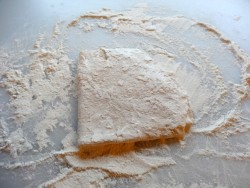
Starting from the side with the fold, gently roll the dough up.

DSC05514

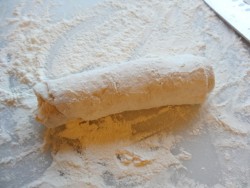
Holding the rolled dough gently in one hand, start slicing thinly from one end (like 1/8″ thick, or as thin as you can get them.) I typically use gentle sawing motions in order not to squish the dough.

DSC05515

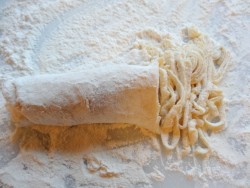
Once the rolled dough has been sliced, add some flour and toss the mound of noodles gently within the flour until they are broken apart and in a loose pile.

DSC05516

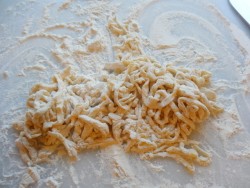
Slide to the corner of the cutting board, and repeat these steps with the other 2/3 of the dough.

Once all the dough is sliced and tossed, add more flour and toss it all together, then spread out across the cutting board in a thin layer.

2014-10-10 21.22.10

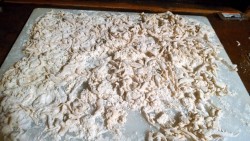
They will look something like this. The  noodles do best if they’ve had some time to dry. Typically, I cover them with paper towels and let them dry overnight. If I’m going to cook them the same day, I leave them uncovered.

When I was a kid, I used to love to eat raw noodle dough. My grandmother, horrified, always told me not to eat too many because they would plug up my butt. 😀

Oh, the memories.

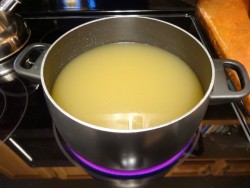
Two or three hours before you plan to serve them, heat up two large cans  (like the size you’d buy canned juice in) of chicken broth in a large dutch oven along with the chicken broth granules. You don’t want this to boil, you just want it to heat up so the granules dissolve.

DSC05519

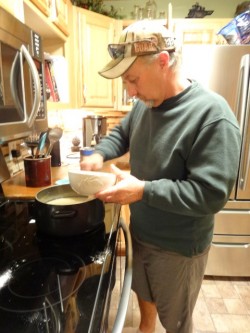
Gently scrape the noodles into the dutch oven, and stir to break up any clumps. Turn the heat to a low temperature; ideally, you want these to barely simmer. Too hot and the noodles will stick to the bottom of the pan.

Stir frequently during the first half hour, and periodically after to make sure they don’t stick to each other or the pan. Leave the pot uncovered, letting the steam rise, and the noodles bubble ever so gently.

DSC05523

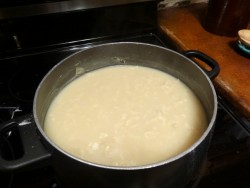
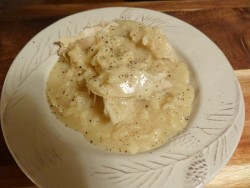
Simmer until the broth reduces and the noodles have a gravy-like texture. If your noodles are bigger, you may need to add more chicken broth during this period to ensure the noodles are fully cooked in their own gravy.

When you can no longer keep your family out of them, you know they are ready. 😀

DSC05526

My husband’s favorite way to eat them is drizzled over turkey, dressing and mashed potatoes. Or chicken and stuffing. Or by themselves.

How do you like to eat your noodles?

Happy Thanksgiving, friends!

How About Some Grilled Meatloaf?!

2015-09-23 07.37.32

I’m here to tell you that grilling your meatloaf is a total game changer. In fact, I’m not sure I will put it in the oven ever again! Unless it’s pouring rain or blowing snow, which might convince me otherwise.

Grilling meatloaf transforms it from a cold-weather comfort food into a refreshing change from burgers. Not that burgers aren’t great, mind you. But change is good. Especially when it involves the grill!

That’s what happened to me…bored with the same old thing, I wanted to shake things up a little. Adding a little char to a comfort food favorite adds a whole new dimension of smoky flavor and texture. Oh, my!

In fact, I’m eating the last piece for breakfast right now. Except there’s not as much left now as there is in this picture. 😉

2015-09-26 08.45.17

When Jimmy and I first got together, I must have tried at least 8 different meatloaf recipes before I found one we both liked. This really versatile recipe for Market Meatloaf calls for cumin and finishing it off under the broiler with cheese and green onions. Sometimes I do that last step, but most often I just pull it out of the oven and serve.

It is NOT spicy, although I think a dash of Tabasco would be really, really good and give it some kick.

The recipe came from Leanne Ely at SavingDinner. About ten years ago or more, I was really going through a cooking rut and subscribed to her service, Menu Mailer. Every week I received an email with 6-7 entree recipes and a shopping list. Most of the recipes were really good, made with normal ingredients, and I ended up with several that I still use to this day.

2015-09-25 16.35.01

Here’s the recipe in its entirety if you prefer not to grill; grilling instructions are in italics. This way you can prepare it either way!

Market Meatloaf 

(Serves 4)

1 pound ground beef (I actually had 2 pounds and doubled it so if it looks like a lot, that’s why)

1 medium onion, finely chopped

1/4 cup oatmeal

1 egg, slightly beaten

3 tablespoons milk (I have used coconut milk before and even mayo as a substitute when I was out of milk and there’s no change in flavor. But Shhhh, don’t tell my husband, he things he doesn’t like mayonnaise.)

1 tablespoon ketchup

3/4 teaspoon cumin

1 teaspoon garlic powder

Salt and pepper to taste

1/4 cup green onion, thinly sliced (optional)

1 cup shredded Cheddar cheese (optional)

Pre-heat oven to 375 degrees or pre-heat grill to between 350-400 degrees.

In large bowl, combine meatloaf ingredients, ground beef to salt and pepper, mix thoroughly and press into an 8 x 8 or 9-inch square pan. If you’re grilling, saute the onion first until soft with a little bit of char on the edges before mixing it with the rest of the ingredients. 

2015-09-26 07.54.19


For the grill, I used a cast-iron griddle pan, then just sauteed the onion in it first. If you don’t have a griddle pan, I imagine a cast-iron skillet would work just as well. 

2015-09-22 18.09.52

Bake 20-25 minutes, or until no longer pink and the juices run clear, then carefully pour off drippings. Sprinkle cheese over the top and broil 3-4 inches from heat source for 3-5 minutes, or until top is lightly browned, then sprinkle with green onions. Cut into 4 big servings.

For the grill, press it into the same pan in which the onions were sauteed and let it sizzle away. I have no idea how long I kept it on the grill because I was hanging out with Jimmy in our bar downstairs. HA! So just grill it with the lid down and, like you would a large burger, check on it periodically until it looks mostly done and has some nice char on the bottom. 

Cut the meatloaf into pieces wide enough to flip and cook on the other side. Mine ended up approximately 1 1/2 to 2 inches wide. Because I was…ahem…multi-tasking, I flipped all the pieces then simply shut the grill off and went on about my life. When you’ve decided it’s done to your liking, remove from the grill and serve.

This would be fabulous with a slice of Pepper Jack cheese melted over it! Or for a breakfast variation, how about an over-easy egg sitting prettily on the top?

Or how about a slice of Colby Jack, some grilled onion strings and on a bun? YUM!

Or simply with ketchup. Or without, since I’m out. 😀

Whatever way you eat it, it’s bound to be good! Give it a try this weekend, and give me a shout out if you tried a different variation. 🙂

Cheers!

How to Make Grilled Corn Dip

2015-07-28 17.07.41

It’s sweet corn time, hooray! And if you love the taste of fresh sweet corn, you’re going to love this grilled corn dip. Trust me on this!

The first time I made this dip, Jimmy and I ate the rest of it for breakfast the next morning. And while I can neither confirm nor deny my involvement, it may have been dinner the last couple of nights. 😀 It’s just that good!

You may know that I am a huge fan of the Pioneer Woman; growing up a farm girl, I can totally relate to her stories. I miss living on the farm! And I love her recipes, because their simple and easy and delicious. The grilled corn dip is in her Year of Holidays cookbook.

2015-07-28 15.05.22

Not only am I posting this for your benefit, it’s for mine too. I can NEVER remember where I put the recipe when I go to make it! Now I’ll know where I need to go. 🙂 She also lists a number of variations for it in the cookbook, but I can’t get past this one to change it. Maybe you’ll be more adventurous!

This is the original recipe;  I doubled the recipe this time so I could share it with friends. (Sorry if you didn’t get any.) 😉

2015-07-28 15.05.42

GRILLED CORN DIP

4 ears of sweet corn, shucked

One 8-oz package cream cheese, softened.

1 cup sour cream

4 green onions, sliced

4 oz. sharp Cheddar cheese, shredded

4 oz. Monterey Jack cheese, shredded

4 oz. queso fresco, cotija or similar Mexican cheese, crumbled

1 tsp. ground cumin

1/2 tsp. paprika

1/4 tsp. cayenne pepper, more to taste

Salt and pepper to taste

Juice of 1 lime

Several dashes of hot sauce (I used Tabasco)

Clean and wash the corn, and either hold it with tongs over the flame of your stove, or grill them if that’s easier. I usually put them outside on the grill, although if I’m making this in the winter and using frozen corn, I have been known to use a grill pan. This is how PW does it.

2015-07-28 16.48.39

I recommend having the heat high enough on your grill that the corn gets a little bit of char pretty quickly. While the dip is still wonderful, it’s the char that gives it the smoky taste. Naturally, it was the hottest day of the year when I decided I had an overwhelming need to make it NOW, so I got impatient and took mine off before mine got a really good char. But no one is complaining! 😀

When the corn is cool enough, slice the kernels off the cob.

Add the cream cheese, sour cream, and green onions to the bowl of an electric mixer using the paddle attachment, and whip until it’s totally combined.

Grate or add pre-shredded Cheddar and  Monterey Jack cheese, and crumble the queso fresco cheese  (I used cotija) with a fork and add them to the bowl with the other ingredients. Mix in the cheeses until they’re totally combined.

2015-07-28 15.45.16

Next, add the cumin, paprika, cayenne, salt and pepper along with the lime juice and the hot sauce.

Finally, throw in all that beautiful corn!

Mix it until the corn is distributed. Cover and refrigerate the dip for at least two hours. It gets better over time!

Serve in a bowl with tortilla chips, corn chips, crostini, or empty potato skins.

2015-07-28 17.07.41

A couple of her suggested variations:

Add 1/4 cup chopped cilantro to the dip for a really fresh flavor.

Add 1 seeded, diced jalapeno for a little more heat.

Enjoy it, and give me a shout if you make it. 😀

Cheers!

Get Your Grill Ready for Summer!

This weekend makes the ‘official’ arrival of summer. The folks at Cargill Beef have supplied some timely and terrific tips to get our grills ready to go for the weekend. Mine is fired up and I’m grilling a versatile new recipe with beef from Sam’s Club. 

We’ve also got a GIVEAWAY! Courtesy of Cargill Beef and Sam’s Club! Shout out in the comments below what you’re grilling this weekend or your favorite food cooked on the grill.  You’ll automatically be eligible to win one of FIVE $25 Sam’s Club gift cards! Winners will be announced Saturday morning. NOTE: It may take a while for your comment to show up, but don’t worry. 🙂

During the summer, my husband and I grill almost every night. We love it, and a side benefit of it is we aren’t heating up the house by using the oven. (Saving money is a beautiful thing.)

With Memorial Day weekend coming, it’s time to get our grill ready for the summer and get grilling!

2015-05-21 15.01.45

1. Check the Hose: Considering your grill may have been sitting for many months without being used, take a few minutes to give it a once-over before you press ignite. Specifically, if you have a gas grill, check the hose from your propane to your burners and make sure it’s intact and clean. If there’s any buildup on the hose, be sure to clean it off before starting your grill. If the hose has any holes or any signs of being torn, it’s worth the few bucks to just replace it.

We bought our grill new just last year, so a quick look shows that all my hoses are in good shape.

2015-05-19 10.59.43

2. Give It a Quick Cleaning: If you have a gas grill, take the grates out and give everything a good scrub down. You can use a wire brush and a damp cloth to get the job done. Soap isn’t recommended. It can linger and it’s tough to wash off. Also, don’t forget to run your grilling tools through the dishwasher before that first cookout.

2015-05-19 10.57.45

I store most of my grilling supplies in a galvanized bucket with a lid near my grill. It keeps them handy, dry and clean. I like having everything contained nearby but not cluttered.

2015-05-19 11.06.33

It’s a great time to take inventory of your grilling supplies as you load them in the dishwasher. Somehow, I was just down to an oversize spatula and tongs; the rest of my grilling supplies have disappeared. I’m guessing they migrated to our RV. 😉

Jot down on your list anything you might need to pick up the next time you’re at the store. One of my pet peeves is to go to use something and not having it!

3. Clean Out Your Grease Trap: Before grilling season starts, be sure to pull out the grease trap below your grill and dump out any grease and grime from last year. For easy cleanup next year, line your grease trap with some sturdy aluminum foil.

2015-05-19 11.00.59

This is what my grease trap looked like. Ewwww, gross! This was actually dangerous! It’s hard to tell by this picture, but the large dark lump actually stood up pretty high; it could have easily caught fire when I was burning off food residue and the grill temp was really HOT.

2015-05-19 11.08.24

So, I wiped it out and ran it through the dishwasher.

2015-05-19 13.55.25

Much better!

4. Test Run Before Cooking: Before you get to cooking, turn on your grill, light it up and let it burn for a few minutes. Watch it to make sure all the burners are firing and there are no leaks.

Now you’ve done this, all systems are set to go and your grill is ready for summer!

Steak is a favorite treat of ours, so I’m grilling some terrific T-bones. If you’re needing some Beef-spiration, there are tons of recipes here. That’s where this recipe came from. 🙂

Did you know that all meat sold at Sam’s Club is fresh, never frozen? Me neither! Together, these big beautiful T-bones weighed almost 4 pounds.

2015-05-21 14.38.35

Beef Steak with Colorful Peppers

Ingredients

2 beef T-bone steaks from Sam’s Club
2 small bell peppers, quartered

Parsley Pesto:
½ cup packed fresh Italian parsley leaves
4 large cloves garlic, minced
3 tablespoons olive oil

Instructions

1. Place pesto ingredients in food processor or blender container. Cover; process until parsley is finely chopped, stopping and scraping side of bowl as needed. 2. Spread pesto generously on both sides of beef steaks and bell peppers. Place steaks and peppers on grid over medium, ash-covered coals. Grill, covered, 11 to 16 minutes (over medium heat on preheated gas grill, 15 to 19 minutes) for medium rare (145°F) to medium (160°F) doneness and until peppers are tender, turning occasionally. 3. Remove bones; carve steaks into slices. Season with salt and pepper, as desired. Serve beef with peppers.

This is my kind of recipe: easy, normal everyday ingredients and simply scrumptious!  I am a really good cook, but I am not a great cook. If I look at over-complicated recipes, I begin to hear bumblebees in my head.

One note about the parsley: there was no Italian parsley to be found this week, a hazard of living in a rural area. Don’t worry, you can use regular parsley and it’s still delicious!

I grilled one steak very rare and left it whole for my husband. He’s working late so it will be a special treat for his dinner.

2015-05-21 14.55.00


The other I sliced as the recipe called for; it was terrific and husband-approved (he sneaked home for a taste after I texted him a picture.) If cooked rare, you can re-heat with eggs for breakfast (YUM!) or put it on a salad.

Now, go forth and grill! And have a safe and happy Memorial Day weekend, folks.

Cheers!

UPDATE: Giveaway winners are: Hayley, Weesie, Lynn, Jenny and Peggy. Thanks for playing everybody, I appreciate it!

Recipe by Request: Turkey Burgers

Flavorful Turkey Burger

Flavorful Turkey Burger

My friend Beth and I were sitting on her front porch one evening talking about World Peace and other such important matters when the conversation naturally came around to food.

Like me, she is trying to work a variety of foods into her family’s diet, rather than eat the same old things. It is SO easy to get into a cooking rut. Trust me: I know.

At her request, I’m sharing this delicious recipe here so all of you have an opportunity to try it. 🙂

This is from my Food Lover’s Make It Paleo cookbook. If you have no idea what the Paleo diet is, just know that Paleo recipes are almost always very flavorful, and made from natural, whole-food products. They are usually also without sugar or grains.

If you like lots of flavor, you’ll like this recipe…and the simplicity of it! You can also use ground beef with this recipe. In the cookbook, it was served as an open-faced sandwich on a Portobello mushroom in the place of bread.

TURKEY BURGERS

1 lb. ground turkey or ground beef

Seasoning:

1 tsp. garlic powder

1 tsp. onion powder

1 tsp. salt (I always use kosher salt in my recipes)

1 tsp. pepper

Mix together seasonings, and pour over ground turkey.

NOTE: If you’ve ever worked with ground turkey, you know it can be somewhat sticky. Just before I dive my hands into the meat to mix, I wash them and spray them with oil. This will make it much easier to make patties without half the meat sticking to your hands.

Form the meat into four equal-sized patties.

I also spray my grill grates before grilling any kind of meat; I even spray my spatula when working with turkey. Pam makes a spray oil just for grilling; your oil just needs to be able to endure high heat.

The recipe says: Grill turkey patties on high for about 5 minutes per side, flipping once.

If you know your grill, you know how much heat works best and where your “hot spot” is. I heat up the grill to about 300, and turn the heat to low, grilling them until the outside edges start to look a little white and there are grate marks clearly visible (which is about 5 minutes). Then, I turn them, watching them closely until there are visible grate marks and they look “done”.

If you cook them too long, they are still flavorful, just dry. It works best if you check them frequently and pull them just at the point they are done.

I can’t roller skate and chew gum at the same time, I don’t know why I ever thought I could multi-task while I was cooking. 😀 Enjoy!

Mine are served here with grilled zucchini and a lettuce wedge with homemade ranch dressing. YUM!


The Sangria Recipe

Delicious Sangria!

Delicious Sangria!

Here’s the Sangria recipe, as promised. This was fun to make, yummy to drink, and made a beautiful presentation!

I would really love to tell you that I created this recipe; it’s more like, I kitchen-tested this recipe for you. 🙂

I’m a huge fan of Ree Drummond, The Pioneer Woman (www.thepioneerwoman.com.) All her recipes are simple and delicious. Every time I make one, it’s like I hit the ball right out of the park. So this is one of Ree’s recipes. Thanks Ree, for making my life so much easier.

2 Granny Smith apples, cored and cut into cubes

1 cup green seedless grapes

1 cup red seedless grapes

2 cups pineapple chunks (I used canned for this, fresh was too much trouble and too expensive!)

1 small unpeeled orange, thinly sliced

2 unpeeled lemons, thinly sliced

2 unpeeled limes, thinly sliced

1.5 liter red wine (such as Cabernet, Merlot or Pinot Noir)

1.5 liter dry white wine (such as Chardonnay, Sauvignon Blanc, or Pinot Grigio)

1 cup orange-flavored rum

1 cup orange-flavored vodka

1 cup sugar

When it came to purchasing the wine and spirits for this, I followed same rule as using wine for cooking: “If you buy a cheap, crappy wine to cook with, it’s going to taste like cheap, crappy wine in your food.” So I looked for something that was good quality but yet reasonably priced.  For the wine, I bought Robert Mondavi’s Woodbridge Pinot Noir and Sauvignon Blanc. I bought Absolut vodka, and Parrot Bay rum.

Place all the fruit in a large container. Start pouring the liquids: the wines, followed by the vodka and rum. Finally, to add a subtle sweetness, dissolve the sugar in 1 cup of water and add it to the mix.

Stir well, cover and refrigerate for several hours, giving the fruit and liquids time to “steep”. Serve in glasses over ice. The fruit is also delicious to eat!  Your guests will think you ROCK. And so will you, if you have too much.  😀

Make a Breakfast Casserole This Weekend!

Amish Breakfast Casserole

Amish Breakfast Casserole

Every once in a while I like to change things up and make a breakfast casserole for Sunday morning. Because I’m going out of town on a Girl Power trip this week, I made this and froze the leftovers. Jimmy can feel the love from me, while I’m enjoying myself on the beach, with the ultimate in comfort food made just for him.

If we’re having a potluck at work, I’ll sometimes take this for breakfast, knowing we’ll have tons of food for lunch. It’s versatile,  you can use bacon or sausage, and you can make much of it ahead of time. It’s all cheesy goodness and everything else that’s yummy about breakfast. Plus it’s simple to make.

If I’m making it the day before, I’ll cook the sausage and mix everything else together but the eggs.

Amish Breakfast Casserole        

  • 1 pound sliced bacon, diced (or 1 lb. cooked sausage)
  • 1 medium sweet onion, chopped
  • 6 eggs, lightly beaten
  • 4 cups frozen shredded hash brown potatoes, thawed
  • 2 cups (8 ounces) shredded cheddar cheese
  • 1-1/2 cups (12 ounces) 2% small curd cottage cheese
  • 1-1/4 cups shredded Swiss cheese

Directions

  • In a large skillet, cook bacon (or sausage) and onion until bacon is crisp; drain. In a large bowl, combine the remaining ingredients; stir in bacon mixture. Transfer to a greased 13-in. x 9-in. baking dish.
  •    Bake, uncovered, at 350° for 35-40 minutes or until a knife inserted near the center comes out clean. Let stand for 10 minutes before cutting. Yield: 12 servings.